
At the beginning of the holidays, the mom attended a community workshop teaching people how to build feral cat shelters. She should have posted this before, but now we've had our first snow, this is a good time. It's a nice hour long weekend project. I know some folks feed and take care of outside cats, so I hope you find this useful.
Here's what you will need:
Measuring tape and yard stick
Exacto knife or box cutter
Magic Marker
Hair dryer
Scissors
18 gallon Rubbermaid storage tub (36 gallon if you want to build one for a couple cats)
Styrofoam for the flooring
Reflectix for lining the top and walls (this is bubble wrap with a shiny reflective material on both sides, and can be found in hardware stores.)
Duct tape
Straw

The Rubbermaid tub and Reflectix.

Measure the bottom of the tub and cut the styrofoam to fit.
You may need to round the corners as I did here.
I find it's easier to measure with the measuring tape
then cut using a yard stick.

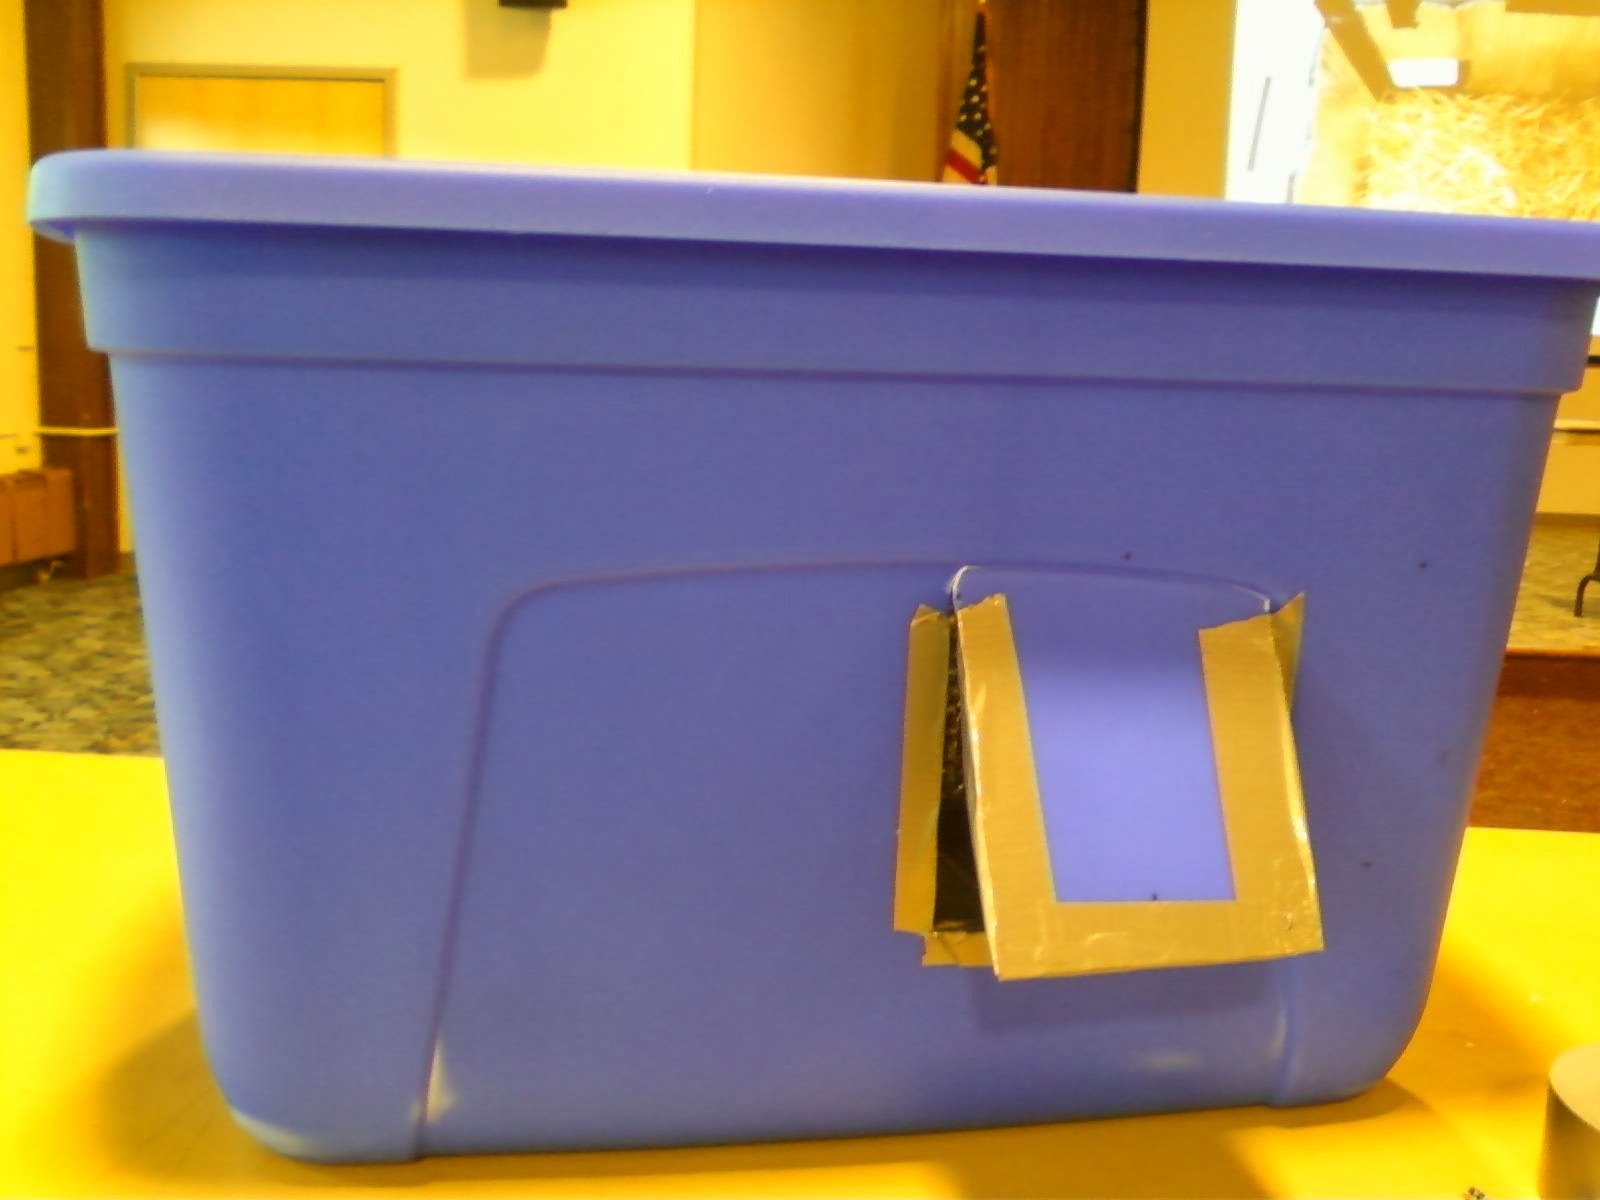
Mark the opening for the door flap, making it 5x5"
and about 4" from the bottom.
and about 4" from the bottom.
Any larger will allow foxes and raccoons in.
I put mine off center so one side had
more protection from the wind.
Make sure the door is on the flat surface.

The top of the door flap will not be cut.
Heat one side with the hair dryer,
then cut and repeat for the other two sides.
I found it easy to score it with the Exacto knife
then go over the score harder the second time
(still using the knife).
It doesn't have to be heated for long.

Cut the Reflectix to fit the bottom and the top.

The measure and cut the Reflectix for the sides.

Trim the Reflectix to fit the top
and tape in place.
Be sure not to tape over the parts
that clamp the top to the bottom.

Cut the Reflectix for the door opening,
Duct tape around all the open seams and sides of the Reflectix,
inside and out, wrapping it around the door openings.
(Sorry I forgot to take a picture of the inside all taped up.
Tape along the top, the sides and tape the sides to the floor.
It should be completely sealed.)
I heated the top of the door and held it open
so it wouldn't lie flat against the side.
At the workshop they had an example made by some girl scouts.
Note they cut their door all the way out and hinged it at the top.

The girls left messages for the lucky kitties.
This one says, "Big cat, little cat, fat cat, skinny cats, all cats are welcome here."

Another welcoming sign:
"Come in little kitty you're so-
pose to come in."

How cute! I just loved it!
Because I can't have things like this in my yard, according to the home owner's association, I donated mine to the local TNR group. They were happy to have it, and it will go to one of their care takers.
There are other styles of shelters, even ones using egg cartons instead of Reflectix. You can click here to see how to build different styles. Good luck! I hope some find this of interest.